Figure
1
|
Study Society |
A
Classy Background
by Steve
Barker (Shoreham)
AS fishkeepers, it is the promise of observing fish behavior and lifestyle that encourages us to set up mini-habitats for our charges.
But how close do our tanks come to the natural world of fish? How can we simulate river, pond or rock pool? Usually the emphasis is on the quality of the water and the interior environment rather than the cosmetic appearance of the aquarium. This could be very important if the tank is in a living area. This problem can be overcome with a diorama.
Figure
1
A diorama is the term used to describe the dry, scenic backdrop placed behind an aquarium. If the fishkeeper carefully designs this to match the layout of the tank, an illusion of depth and natural beauty is created. Why not build your own diorama? The cost is minimal.
Since a diorama fits on the outside of the tank, no swimming space is taken up (Fig. 1 ). For the same reason, there is no risk of water contamination. All airlines and wires can be tucked away neatly behind the backdrop. The illusion of depth has been mentioned, and if painted in light tones, the diorama makes an efficient reflector. The only snag is that the back glass must be kept clean, but that, in any case, is good practice.
These are the materials you will need:
FOR THE BASE:
Piece of softwood at least 12 mm (!/2") thick. The length equivalent to that of the tank, the depth depending on shelf space available behind the back glass - 30 cm (12") should be ample.
FOR THE BACKDROP:
One sheet of thin hardboard, the width corresponding to the height of the back glass. Length is best measured exactly when the base is cut to shape. Add at least 45 cm (18") for the measurement taken from the length of the tank.
 TOOLS:
Figure 2
CONSTRUCTION:
Step one: is the base.
Choose the straightest edge of your softwood to be your face edge. Place
this against the back glass and make sure it
is the same length as the tank. Next, mark off the timber halfway down
its length on the face edge. From here, measure off the width you have
decided upon....15-30 cm (6-12") is a good depth.
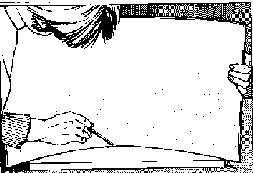
The curve can be drawn by placing the hardboard sheet in position on the base, and bowing it. It should bow back until it lines up with the width mark (fig 2). Simply run the pencil along the inside to accurately draw your curve. Cut along this pencil line with a saw.

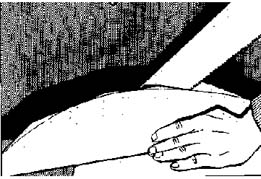
You will find this easier if several straight cuts (fig 3) are made and the curve finished with a spokeshave. This completes the base.
Step two - the backdrop.
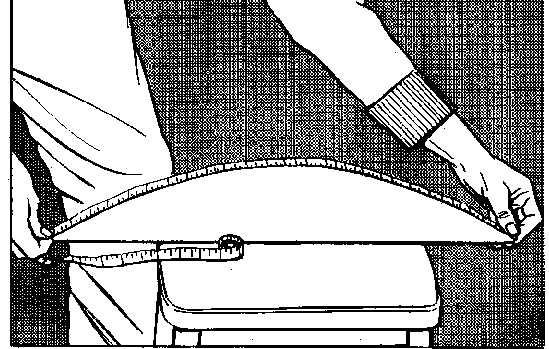
Once the curve of the base is cut, it can be measured (fig 4). Accuracy
here is important. Add 25mm (1") to your measurement and then cut the hardboard
to this size. Check again that the width is the same as the aquarium height.
Figure
3

Step three - fitting
backdrop to base. Lay the base on edge, curve uppermost, and run a bead
of weed glue along this. Place the hardboard sheet on to the base in its
final position.
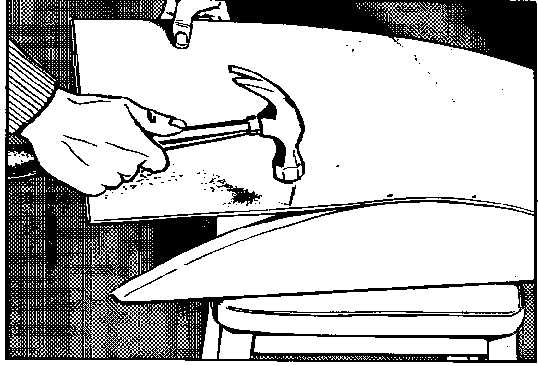
Starting from about the center, drive the panel pins
through the hardboard into the edge of the base.
Figure
4
 Space
these at 15 cm (6") intervals or less and work towards each end. The hardboard
should bow easily to follow the curved base (fig 5). An overlap will be
noticed, and this will give a neat finish when the diorama is in position.
Allow to dry.
Step four - the modeling.
Mix up the wallpaper paste in a large bowl as instructed on the packet.
Shred up your newspapers and place in the paste. Mix the two together,
adding more paper if necessary to make a doughy consistency.
 Laying
your diorama on its back, model the mixture on the hardboard (fig 6). Here’s
your chance to produce a work of art. The scene may be the river bank,
with exposed roots showing, or the intricate nooks and crannies of a barnacle
encrusted rock pool.
Try to imagine how these aquascapes would look viewed from beneath the water, referring if necessary to photographs. Any permanent fixtures, such as pieces of driftwood or plastic plant, should be added while the paper mix is still wet.
When it does dry, mix up the filler so that it is
slightly runny. The sculptured scenery is then coated with a thin layer
to leave a smooth finish.
Once the diorama has hardened off, it will be ready
to paint. Emulsion is best, as it dries quickly and can be blended or diluted.
The addition of black here and there enhances the contrasts (fig 7).
 Figure
7
When you are satisfied with your artwork, all that remains is for the diorama to be placed in position behind the tank. You will probably notice that the dioramas base will be visible, and to hide this add handfuls of dry gravel over the bare wood to the same level as that in the aquarium.
LIGHTING:
If your light source is directly above the back glass, the illumination will be even throughout. Alternatively, a separate light source of the same or similar output to that of the tank can be placed over the diorama. Correctly placed lighting will make it even harder to detect the presence of a backdrop.
A diorama is unlikely to enhance the environment for the occupants of the aquarium beyond reflecting some light back into it. It will however create a sense of realism for those studying the occupants. Such a setup will be much more acceptable in a lounge and may generate interest in those who may otherwise be indifferent to life beneath the surface of the water.
The potential also for very convincing photography
cannot be underestimated.
Other Articles by Steve Barker:
Sticklebacks in Widewater
Lagoon
|
|
|
|
|
News 2018 |
Membership Form |
|